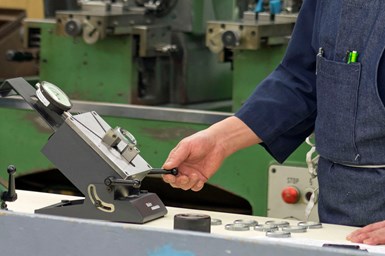
Circles are a frequently produced form in the shop. Many different processes generate this form — including turning, milling, centerless grinding, boring, reaming and drilling — and there are a variety of gaging methods used to measure inside and outside diameters (ID/ODs) of these circles. For simple operations, shop employees can measure a hole with a scale or a fixed go/no-go gage. For more complex operations, employees can use precision measuring machines like coordinate measuring machines (CMMs) and optical or vision machines. However, in production environments, employees can accurately measure most ID/ODs using one of several varieties of comparator gage.
Comparator gages for ID/OD come in two basic styles: benchtop and portable. Operators with shopfloor level skills should use these gages in high-volume, high-performance applications. Because these gages provide a comparative measurement, they require a master to set the zero reference point when determining part deviation. Comparator gages have limited travel, but this allows the use of a high resolution dial or digital indicators and high resolution electronic probes with amplifier readouts.
Choosing whether to use a benchtop or portable gage will depend on the size of the part being measured and whether the user will bring the part to the gage or the gage to the part. Typically, benchtop comparative gages work best for small parts and are generally restricted to measuring single dimensions or features that are less than 255 millimeters (~9 inches) in diameter and not more than 25 millimeters (~1 inch) deep. Portable ID/OD gages can go as large as 2,500 millimeters (~8 feet) and as deep as 125 millimeters (~5 inches). If a manufacturer needs to go deeper than that, bore or plug gages are a better choice.
What Should You Know About Benchtop Gages?
Benchtop gages are capable of higher precision than portable gages, with resolutions of 0.0005 millimeter (0.00002 inch) readily achievable. Typical of these are the “plate gages” seen in the bearing industry or anywhere that requires fast readings of ODs or IDs. The tilting stage plates are used to set and locate the part each part and this basic design has been around for more than 50 years. Plate gages are convenient for fast, comparative gaging of flat, thin-walled parts, such as bearing rings. In these applications, users must make diameter measurements in a plane parallel to at least one of the faces, and sometimes at a particular depth on the ID or OD. Versions are available for 2-point or 3-point measuring that allow for the checking of parts that have form errors with even or odd numbers of lobes.
What Should You Know About Portable Gages?
If the part is large or awkward to manipulate, or if measurement requires setting it up on a machine, use a portable, beam-type gage. Beam-type gages are available with maximum capacities from 25 mm (~1 inch), to about 1100 mm (~40 inches), the largest ones being used to measure bearings and large bores in casting. Actual measuring range is typically 10 mm (~0.4 inch), but is ultimately determined by the indicator installed.
Read more: Choose the Correct ID/OD Gage for the Task


